


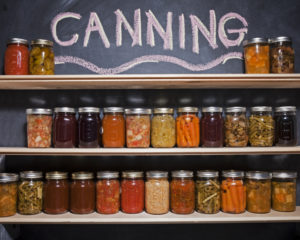
 I love it when my garden produces a bounty of veggies for canning. I get a thrill out of stocking the plethora of canned jars in my storage room and having them handy to enjoy throughout the year or give away during the holidays. They make great gifts.
Canning is a wonderful way to capture the vibrant taste of fruits, vegetables, and even homemade jams, giving you the chance to enjoy them long after the harvest is over. Canning can be intimidating to some. I was lucky my mom cans and she taught me. But with so many tutorials on the Internet you could easily master the craft. However, there are some essential tips I’d like to share with you so that your canning adventures prove successful.
Choose the Right Equipment
Having the proper canning equipment is crucial. Invest in high-quality, food-safe canning jars, lids, and bands. Ensure your jars are free of chips or cracks, as imperfections can lead to spoilage. A large canning pot with a rack for easy jar placement, a jar lifter, and a wide-mouth funnel will make the process smoother.
Follow a Trusted Recipe
Canning is a science, and deviations from tested recipes can lead to unsafe products. Use recipes from reputable sources like the National Center for Home Food Preservation, the Ball Blue Book, or trusted food blogs. These recipes are meticulously tested for safety and optimal flavor.
Practice Good Hygiene
Cleanliness is paramount in canning. Wash your hands, utensils, and equipment thoroughly before starting. Sterilize your jars and lids before filling them with your precious preserves. Proper sanitation reduces the risk of contamination.
Prepare Ingredients Thoughtfully
Use fresh, ripe produce for the best results. Wash fruits and vegetables thoroughly and remove any bruised or damaged portions. Peel, chop, or slice as needed according to your recipe. Keeping uniform sizes ensures even cooking and a pleasing presentation.
Leave Adequate Headspace
Headspace is the gap between the top of the food and the rim of the jar. It allows for expansion during processing and forms a proper vacuum seal as the jar cools. Follow your recipe’s specific instructions for the recommended headspace, typically ranging from 1/4 inch to 1 inch, depending on the type of food and altitude.
Process Properly
Pay close attention to processing times and methods specified in your recipe. Use a timer and follow altitude adjustments if necessary. Overprocessing can lead to a loss of flavor and texture, while under processing may result in spoilage.
Master the Seal
A successful seal is the key to shelf-stable canned goods. After filling the jars and wiping the rims clean, carefully place the lids on the jars and screw on the bands until they’re snug but not overly tight. During processing, the vacuum seal will form as the jars cool, creating a distinctive “ping” sound. I love hearing my jars “ping.” Ensure that the center of the lid is depressed, indicating a successful seal. If a jar doesn’t seal, refrigerate it and consume it within a few days.
Canning is a rewarding skill that allows you to savor the flavors of summer all year round. By following these tips and guidelines, you’ll be well on your way to creating delicious, safe, and beautifully preserved foods that you can enjoy and share with your loved ones and will bring you one step closer to being prepped & prepared.
Happy canning and until next time… stay prepped & prepared!
Pepper

** I do not receive any compensation for products offered here.